Sunday, November 16, 2014

I can make 10, can you?

We have been working so hard in room 19 learning our numbers 0-10, what they mean, how to represent them and of course, how we can put them together to make 10!

Last year this unit gave me a headache was very hard for our kinders, and they are now also paying for it in 1st grade.  We as K teachers weren't sure what worked, made some mistakes, found some great ideas, and created some great ideas!

Our math curriculum is pretty rigid, and it doesn't leave a lot of time for self exploration and hands on learning with the concepts, so we have implemented Explore Weeks!  This allows for us to teach the content, give students a good base, then spend an entire week in centers discovering, deepening our learning and sharing with our friends!

To help with this, I created a new pack, Ways to Make 10!  This unit was created to be used independently in centers, or can be used as reinforcement for students who aren't quite ready to work alone.


 The first center allows for reinforcement of number order.  At our school, we use AIMsweb, so these cards are extremely helpful for students to practice what they will be doing in a few weeks on their middle of the year AIMsweb.  The cards are included for first, second and third number missing for numbers 1-10.


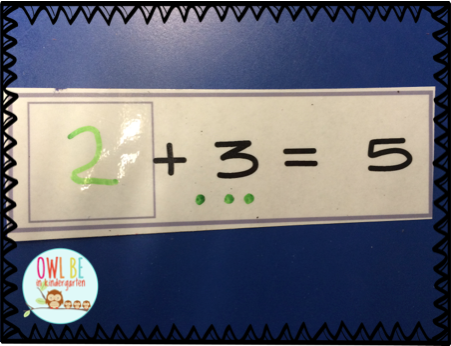
The second center is aligned directly to the way that our curriculum teaches the ways to make 10, and I love that the students can have such a visual!  This center allows for the students to cross of the cubes to count them, write how many, and how many it makes all together. 


The last center is a matching center.  The students take the cube trains and match it to the card with the correct numbers on it.  I loved this one because it also subtly gets students reading the word AND each time ;) sneaky teacher moves!

After a week of using this center with my students, their mastery levels were excellent!  I was so impressed with the students ability to explain the what, how and why, and there was a lot less confusion than last year!  

You can find this center, along with more math resources and much more at my TpT store


About that lengthy absence...

Why yes I am still around, and didn't quite completely fall off the earth!  So many things happened over the last few months.. let me see if I can catch you up quickly! On top of the three things I'll share with you, there have been numerous Ole Miss and college football games, grad school and creating of products!

The school year started and I have my hands full with a lively bunch of 19 kinders, in 4 years this has been my smallest class yet, but they have definitely brought on their challenges!  Here is a peek at my classroom!  I love, love the green walls and that it was this way when I got it!  It makes for a much more warm and inviting room, and green is suppose to be calming, right?


On October 18th, I also had the very best day of my life, I got married!  We had such a perfect day, even though about 24 hours before we weren't sure if it was going to work out... You see we found this BEAUTIFUL lodge on a lake that was just perfect.  Except you see, we live in Mississippi and there are about a billion mosquitoes.  God was definitely looking out and we were able to have some cooler weather and a light breeze, along with a fogger and some bug spray, and everything worked out perfectly!


Some of the most exciting news over the last few months however might be this...


We are expecting our first baby in March!  We are going to stay on Team Green, as in we are not finding out what the baby is.  This was a long, hard fought battle, but there are just so few surprises in life, and this might be the biggest & best!   


So hopefully you can see why I've been so absent recently!  It has been difficult to keep up with everything that has been going on!  


Saturday, August 16, 2014

Ugly Cabinet Fix!

I'm so excited to share with you my bright idea this month!


I have this really awful cabinet in the back of the room that I don't really need.  I can and do use it for storage, but I have begged since I moved into this room for it to be moved out, I WANT THAT CORNER SPACE!  Well.. turns out that when they redid the flooring and baseboards in the room, instead of moving the cabinet, they just placed the baseboard around it and have just waxed it into the floor for years... just.my.luck

So, since I'm stuck with this eye sore instead of being able to get rid of it, I decided to make it efficient for both myself and my students.  I have placed some storage inside but this little idea is going to make our writing center so much more exciting this year!

Dun, dun, dun...


So this stuff worked great!  No paint fumes, and just one coat covered the whole cabinet.  I picked it up at walmart for under $20 and it didn't even use a 1/4 of the can.  I purchased some chalk from the dollar store for my students to be able to practice writing their names, letters and sentences over the next year!  I can't wait to add this as a novelty in the room to keep students interested and working towards becoming writers!  


I haven't quite figured out all of the logistics about keeping it clean, but I'm thinking of a sponge in a baby wipe box so it will stay damp, and it will be apart of the board erasers job to clean it before we leave each day!

If you enjoyed this post, you can find out more about me on facebook, TpT or instagram!  


For more bright ideas more than 100 different bloggers, please browse through the link-up below and choose a topic/grade level that interests you. Thanks for visiting!


Friday, August 1, 2014

August Currently and summer update!

Holy cow!  I can't believe that it is already August.. where on earth has the summer gone!  

This has been my first summer since I turned 14 that I have not had a job or some sort of obligation to commit, and it has been so wonderful.

I'm so excited to be linking up with Farley this month for her Currently! 


This one is pretty self explanatory for any teacher that is gearing up for back to school!  

Listening: Dallas Cowboys Cheerleaders: Making the Team -- I'm a sucker for a reality series!

Loving:  This summer has been the best.  I have celebrated the wedding of 2 friends, had some much needed R&R, worked on TpT and done so much wedding planning.. LESS THAN 3 MONTHS. woah.

Thinking:  My classroom is constantly on my mind.  We are going on vacation next week in Florida and I will not be able to get into my classroom until our week of professional development.  This is of course making me very nervous as it will mean a lot of late nights and probably being there all weekend, but I know that it will all be worth it! 

Needing:  Today I organized the office (it looks more like a tornado) of things to be loaded into the car to take back to school.. I will get about 30 minutes to drop stuff off on Monday

1st day of school:  I love the first day of school but it is so exhausting.  The majority of our students have not come from any PreK program and so we are starting from scratch.  This means a lot of practicing routines and procedures so that we can start off on the right foot.  I also like to start centers on day 1 so that the students get some time to socialize with their new friends and get a chance to do some play in the first few days!  

Be sure to head on over to link up!  

Saturday, June 21, 2014

Bright Ideas: How Do You Get Home?


I hope that so many of you, like me, are enjoying your summer and taking time for yourself to recharge your batteries, get fresh ideas and plan for the upcoming school year!  For those of you still in school, I will be jealous of your August summer photos while I'm already back in school.

Teaching K is very exhausting in the beginning of the school year because students are scared, timid and don't always know the answer to the question you are asking.  If nothing else goes right during the first few days of school, I hope, pray and often panic that the wee littles will get home to their parents.

To help, I created this small chart that hangs in my classroom all year.  Each student gets a clothes pin with their name on it and then clipped to the correct column.  For students that ride the bus or go to day care, I put either the bus number or abbreviate the day care so that I know and its great for subs, my assistant and anyone else that is helping with dismissal that normally does not.  In the first few days of school, I clip these to the students shirts or backpacks and as they get on each bus, daycare stop or with their parents, I take them back to be ready for the next day!


If you enjoyed this post, follow me on facebook, instagram, or check out another bright ideas post about an adorable seating and storage arrangement in your classroom!


For more bright ideas more than 100 different bloggers, please browse through the link-up below and choose a topic/grade level that interests you. Thanks for visiting!


<!-- start InLinkz script -->
    <div class='InLinkzContainer' id='413414' >
    <a rel='nofollow' href="http://new.inlinkz.com//luwpview.php?id=413414" title="click to view in an external page.">An InLinkz Link-up</a></div>
    <script type='text/javascript' src='http://static.inlinkz.com/cs2.js?v=007'></script>
<!-- end InLinkz script -->

Saturday, May 17, 2014

Bright Ideas: Where is my class list?

Happy May!  I can't believe that the school year is almost over, we are so close to summer, and some of you have already started thinking ahead to the fall.  136 teacher bloggers have teamed up again to bring you more bright ideas for the classroom that are low cost, time saving and absolutely amazing!


For my bright idea this month, I'm telling you about a small idea that has helped me out so much!  Admit it, we have all been at the play ground and can't figure out which child is still missing with so many children out there, the fire alarm goes off while students are in the bathroom and you don't have your class role with you -- YIKES!  Well I have found a quick and easy way to keep it with you at all times!  

Many teachers are required to wear a lanyard all day for identification around school at all times.  Well, what better way to keep your students names with you than to put it on your lanyard.  Please excuse this picture from my first year of teaching on this ID card....


On the back of my lanyard I took a sticky note and wrote all of my students names, they are in alphabetical order by last name.  This way, when I need to line them up quickly and in alphabetical order for things like a fire drill, I am able to do so and know exactly which child is missing so that my assistant and I can identify if they are absent, in speech, bathroom, or wherever else students get pulled to be during the school day.  

After I wrote all of my students names on the sticky note, I placed it on the back of my ID card, stuck it into a laminating sheet, and ran it through the laminator.  After I ran it through the laminator I cut it out of the sheet leaving a little room around the edges, and ran it through 2-3 more times to make sure that it was sealed, and poked a hole with my lanyard so that ti would stay.  This is my tag at the end of the year, so you can see that it is rather beat up, but it has held up, and when I have felt that it has gotten too loose, I just throw it through my laminating machine again to tighten it back up!  The best part is that this can be used year after year because it hasn't stuck to the tag so in August I can simply do it again.  


If you enjoyed this bright idea, please consider joining me on Facebook, Teachers Pay Teachers or Pinterest for more great ideas.

For more bright ideas more than 130 different bloggers, please browse through the link-up below and choose a topic/grade level that interests you. Thanks for visiting!


Monday, May 5, 2014

Teacher Appreciation Week Giveaway

Happy Teacher Appreciation Week y'all!  I can not believe that we have made it this far into the school year -- we have less than 4 weeks left.  To celebrate another year coming to a close, Amy from Teaching in Blue Jeans has put together a Teacher Appreciation Blog Hop and Giveaway!

Amy has put together a giveaway and blog hop of 55 Kinder/First Grade BEST SELLING products for you to win!  The products that are in this bundle are absolutely fantastic, many of which I use in my own classroom.

I am here to tell you about the best seller that I have in this giveaway.  My best seller is my Addition Mega Pack.  I created this pack for the students in my room to master addition and subtraction as well as number writing to 100.


The CCSS standards for Kindergarten addition and subtraction had me quite nervous about the success my students would have to be able to add within 5 fluently.  But this pack has helped my students excel and meet or exceed the standards!  

Included in the pack are 3 different sets of fact cards, one with the missing answer, and two others with missing addends.  Below are some examples...


The next feature of this pack is the Clip a Sum activity.  Students receive a card and a clothes pin and clip the answer.  On the back of the card I put a sticker where the correct answer is so that the students can self check.  


This pack also includes sheets for writing numbers to 100, with help and without help!  You can see some examples below.


You can read a full description of this product here.

Continue on The Best for the Best Teacher Appreciation Blog Hop by clicking the picture below.  Jessica from the Littlest Scholars is a dear friend of mine and has some fabulous products and is a great National Board Certified Teacher!  I hope that you will love her products as much as I do!  If you continue scrolling to the bottom, you will find the giveaway to enter... Happy Hopping and good luck :)

Photobucket
a Rafflecopter giveaway

Sunday, May 4, 2014

Wonderful Wish List Linky


Hey y'all!  

Who doesn't love a good sale, and celebrating teachers?  TpT is having a site wide sale this week to celebrate Teacher Appreciation Week and many stores will be up to 28% off.  The wonderful Tina from Tina's Teaching Treasures  has organized a linky to showcase some items on our wish lists.

The first item that I am moving from my wish list to my cart is Flipping for Phonics Guided Reading Flip Books from Tunstall's Teaching Tidbits.  


These flip books look so amazing for my high group of kinders for enrichment and provide such a fun and cute way to get the students making the correct sounds and ability to visualize the letters when they work on their writing.  I am so excited to make these and put them to use in my classroom after purchasing them!


The second item that I'm going to purchase is from Jessica at The Littlest Scholars.  She has created a wonderful letter sound tutor with her product All About the Alphabet.  


This pack comes as an audio file and a PDF so that you can download the listening center into your iTunes and place it onto an iPod, iPad or other listening device.  These can also be burned onto CDs and placed in a CD player for students to use.  Each letter has a book to go along with it that will teach your students to write, recognize, say the letter name and sound.  Each sound clip lasts about 5 minutes and can be playing 2-3 times during centers for your students.  You can see where I blogged about her Teach Me Sight Words here

The last pack that I will be purchasing off of my wish list comes from the fabulous Deanna Jump!  Her Nonfiction Interactive Reading Journals are CCSS aligned and will be the perfect addition to both reading and writing in my classroom!


No matter the standard you are teaching for Informational Text K-2 this pack will have it!  I am so excited get my students thinking more critically by using this pack and letting them really comprehend the nonfiction stories that we read in class.


The last item for today's link up doesn't come from my wish list, but it is the item from my store that has been THE MOST wish listed!  A few months ago after searching high and low for morning work that works for my students I just couldn't find anything perfect, so I decided to create my own and this product was born...


My Morning Work: The Bundle is by far the best deal.  During the sale you will be able to score this bundle to have year round morning work for $7.20!  This bundle is not yet completed, but it will never be this cheap again!  Each month is CCSS aligned activities for your students to complete while you are running around your classroom in the morning.  Each pages includes reading and math, and one day a week your students will draw a picture and write a story.  This pack currently includes February, March, April, May & August and the other packs will be uploaded soon!  You can check out each month's pack by clicking on the month above.  


Blogger Code:

Thursday, May 1, 2014

A birthday celebration!


Y'all I can't believe that it is already MAY! I can not believe that we are done with school at the end of this month, and I also can't believe that I will be 26 this month! A lot of really fun things are happening for me this year, including 2 best friend weddings, MY wedding, and who else knows what other excitement is to come along. I am celebrating my birthday and the excitement of this year with a HUGE giveaway of over $150 worth of products from some of my blogging friends, and a $20 gift card to my own store. You can enter my rafflecopters below for each of the bundles, and you can pin and post images on your facebook/pinterest for extra entries each day!


a Rafflecopter giveaway

a Rafflecopter giveaway

a Rafflecopter giveaway

a Rafflecopter giveaway


a Rafflecopter giveaway
Thank you for helping me celebrate my birthday! 


Saturday, April 12, 2014

Teacher Problem #29423: Hanitizer

Welcome to April's Bright Ideas Blog Hop!  This month's hop is a little different than before, and it will not be a direct hop from blog to blog, instead you can check out the inlinkz below to hop to your next bright idea!


Y'all, I don't know about you, but hanitizer has almost become part of my vocabulary.  For those of you that don't know what it is, it is the words hand sanitizer put into one, hanitizer.  It is so adorable when someone so small asks for it ever so innocently, but really, how do such small hands use so much hand sanitizer so quickly!?


Well, part of the problem is that the bottles are made for grown up size pumps, and even that is too much.  Teaching little ones to "just push down a little" is very difficult for those with weak fine motor skills, and it is also difficult to get away from the kids who think that it TASTES and SMELLS so good.. YUCK!

I have solved this problem in my classroom with a simple rubber band.  Yup, that is really all you need to get enough sanitizer into your students hands and they can even do it themselves!  Place the rubber band around the neck of the pump, and it will only go down about a quarter of the way, it give your students the perfect amount.


Now bottles of sanitizer are lasting much longer in my classroom, and there is much less waste, which makes everyone happy!

If you've enjoyed my bright idea this month, follow me on Facebook, Teachers Pay Teachers, or Pinterest.

For more bright ideas from 150 different bloggers, please browse through the link-up below and choose a topic/grade level that interests you. Thanks for visiting and happy hopping!


Saturday, April 5, 2014

My first ipsy bag!

Hey y'all!  I'm not sure if you have heard about ipsy, if you haven't let me let you in on a great little secret.. these $10 monthly makeup bags are so cute and so affordable.  I live in a small town in Mississippi over an hour from any makeup specialty store, and I'm too impatient to order online, so this is a great way to get a surprise in my mailbox once a month!

Once you subscribe to ipsy you take a quiz that asks your makeup likes and dislikes, skin color, type of skin to fit your personality.

You can take a peek below at my March ipsy bag!

First, each month's makeup comes in a fun bag that can be reused in a million ways!  I'm just thinking of the ways that I can save these to use in my classroom, sight words, pencils, sanitizer, emergency bag with a class list and parent phone numbers to grab and go, flash card storage, I mean the possibilities are really endless..


Next, here are the 4 products that I received...


My most favorite products are the pixi face primer and the bareMinerals lipstick.  Let me tell you, I hate lipstick.  I think that it comes from dancing for so long when I was little and the bright red lips that came along with it, but I'm more of a chapstick, lip gloss kinda girl.  This lipstick is such a natural color and is the perfect accent on my lips!  The pixi primer has also helped keep my make up on longer throughout the day, which has been so helpful!  

The eye shadow kit is also a wonderful addition to the collection that I had already.  These are such bright and bold colors, I'm so excited to use them this summer! 

Normally I am a huge fan of nail polish, but this one from Nicole by OPI really missed the mark for me.  This new trend of the roughless is just not for me.  This nail polish dries and feels and looks rough, and the wet/shiny look is just something that I am a bigger fan of, some little girl in my class will really enjoy this find in the prize box so soon :) 


Once you have received your items, you go back to the ipsy website and rate all of the items that they sent to you, so that ipsy knows their hits and misses and can better tailor your bag to you!  You can also retake your quiz at any point to change your likes and dislikes, which is also fun to try out different products.


If you think that you want to join ipsy you can do so here at my referral link, to get started today!  My favorite part is that you can cancel at any time.  You can try it out for 2-3 months and if you don't like it, you can cancel.  I currently am really looking forward to this month's bag!


Thursday, March 20, 2014

Teach Me Sight Words!

Y'all, she's at it again!  My dear friend Jessica at The Littlest Scholars  is at it again and has another set of interactive listening centers to help your students learn.  This time she has created Teach Me Sight Words to give your students a ~5 minute sight word tutor to help reinforce and teach sight words.

Here's how it works...


You can purchase and download this set from Jessica's store, and print it.  It is better to print these on a color printer because the sight words that are the focus of each book are highlighted in yellow, but this is not necessary.  


Next, cut the books out.  I chose to only cut 3/4 of the border so that I could use the other side of the border to staple so that none of the student workspace in the book was cut off.


I downloaded the file and uploaded the files into itunes.  This was such an easy process and I added them to my library.  I placed the files onto two iPods that I have, but you could upload these and burn them onto a CD or tablet.  Placing them on more than one iPod allows me to have students working on different words at the same time, and the ability for students to move onto other words if their others are not ready.  


What I love about these pages is that the students can listen to the recording 3-4 times so that they are able to complete each of the pages.

The activities in this book include:
Reading and spelling the word
Reading the word in a sentence
Tracing the words with your finger
Tracing the letter with a pencil
Finding and circling the word
Writing the word
Writing the word in a sentence

I place these iPods in centers and allow students to choose to head to that center.  One of my little sweeties can not get enough of these books and has learned 3 new sight words this week, and for her this is a HUGE deal.  She loves to read her book to my assistant and I and has been so proud of the work that she has been putting in.  These books are such an investment, and the best part is that they are self guiding, if she is not able to read the books on Monday when we get back, she can do the same books again!

To save paper, you can also print all of the books, laminate and cut them and place them in a center with an EXPO marker so that the students can reuse them again, and again!

You can download a FREE copy of the sight word AND here.

Happy Spring, y'all :)

Sunday, March 9, 2014

What teacher doesn't need more storage?

Well, we are at it again! Nearly 200 teacher-bloggers have teamed up to bring you another round of BRIGHT IDEAS... no products, no freebies, just great ideas to help make your day to day teaching life easier!  You will be able to complete the hop from any blog, as it is a large circle, so there is no real beginning or end, or you may go to the inlinkz at the bottom of this page to check out where to hop next!


This year I came to a new school and a new district to become their 5th Kindergarten teacher! When I came into my classroom it was bare, 3 bookshelves, 2 tables and NO chairs! I wasn't too worried about gathering resources, my biggest question was where I was going to put all of these little bodies that were arriving in just a few days! We were able to find about 24 chairs, but still that wasn't going to be enough. It was enough for students to have a place to sit when working whole group, but not enough for my table or my assistant's table for small group instruction... So my bright idea is CRATE SEATS! 

Crate seats can be expensive to make, so I found short cuts any place I could without cutting the quality of the end result.

Materials to Gather:
1 -- crates
2 -- wood (I went to Lowes and spoke to someone about buying the right stuff, I bought a large piece of ply wood, and they cut it for me at no charge! The measurements you need are: 15 3/4 x 12 3/4)
3 -- cushion (To make this step cheaper, I used an egg crate that is typically put onto bed, I purchased the XL twin from Walmart)
4 -- cute fabric (Who knew fabric was so expensive?  I purchased a flat sheet bed set from Walmart, costs roughly $5, this won't make me feel as bad when I want to change them out year to year!)
5 -- staple gun
6 -- staples for staple gun

Optional
1 -- shower curtain (Teaching K, you just never know what is going to happen or the fluids you may come across, little did I know JUST HOW MUCH this would save my life this year!)

Step 1: gather all of your materials


Step 2: ASSEMBLE!

First, I took the egg crate as a whole and placed it over the cut board and used a marker to mark off where I needed to cut, then cut the egg crate.

Second, I placed the shower curtain over the cut egg crate, marked it and cut it -- you want to make sure this will go around to staple onto the back so that nothing can leak around it!

Third, I stapled the shower curtain into the board to hold the egg crate in place.

Fourth, I laid the bed sheet out onto the table.

Last, I marked off and cut the bed sheet to fit over the egg crate and the shower curtain and stapled it to the board.


Then, repeat!

Step 3: Sit, store, teach and enjoy!

Here is the finished product!  I made 12 of them and still had 2 or 3 pieces of the board left over, but 12 pretty much took up all of the bed sheets and the egg crate.


Classroom benefits of crate seats:
-- STORAGE!  I store everything from school supplies, reams of paper, seasonal books, changes of clothes, and teaching resources in these bins!   They hold so much and make for less clutter!


-- Perfect sized seats for little learners (Adults of many sizes have also sat on the crates in my room and they've held up wonderfully!)


-- Adds a pop of color to the classroom


Up next on the hop is Nicole from Teaching with Style!  She has some great fun guided reading warm up games to get your students ready to learn.  Just click her icon below to continue hopping, or you can scroll down to the inlinkz to hop around!